NM01Z1490006
Choose Quantity
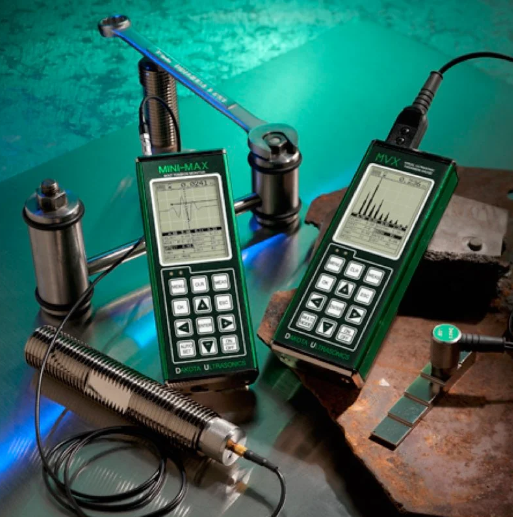
Dakota NDT MVX v2.0 | Advanced A/B-Scan Ultrasonic Thickness Gauge
High-Speed Digital Signal Processing for Absolute Precision
The MVX v2.0 is a high-performance ultrasonic thickness gauge designed for inspectors who require visual waveform verification. Powered by a cutting-edge 100MHz DSP platform and FPGA technology, the MVX v2.0 provides the speed and stability of a laboratory instrument in a rugged, field-ready housing. Whether you are detecting localized pitting or measuring through thick industrial coatings, the MVX v2.0 offers the visual clarity and manual control necessary for code-compliant inspections.
Key Performance Features
Advanced Signal Control: Features both Manual and AGC (Automatic Gain Control) with a 50 dB range, plus built-in Time Dependent Gain (TDG) tailored to each transducer type to compensate for material attenuation.
Versatile Display Views: * A-Scan: View RF or Rectified (+/-) waveforms for precise gate positioning.
B-Scan: High-speed cross-sectional view to visualize the "profile" of the back wall.
Large Digits: High-visibility mode for quick thickness checks.
Dual Independent Gates: Allows for sophisticated measurement logic, including peak-to-peak or flaw triggering within specific zones of the material.
High-Speed Refresh: The 25 Hz screen refresh rate ensures the waveform remains fluid and responsive during high-speed scanning.
Thru-Paint Expertise: Seamlessly switch between Pulse-Echo (P-E) for pit detection and Echo-Echo (E-E) to ignore coatings and measure the base metal only.
Technical Specifications
| Feature | Specification |
| Processor | 100MHz DSP with FPGA Technology |
| Display | 1/8” VGA Grayscale (240 x 160 pixels) |
| Refresh Rate | 25 Hz |
| Gain Range | 50 dB (Manual or AGC) |
| Memory | 4GB Internal SD Card (Massive Data Logging) |
| Connectivity | USB-C (High-speed data transfer) |
| Software | Compatible with Windows® and macOS (OSX) |
| Transducer Type | Dual Element (Standard) |
Physical Dimensions & Weight
| Attribute | Measurement (Metric) | Measurement (Imperial) |
| Width (W) | 63.5 mm | 2.50 in |
| Height (H) | 165.0 mm | 6.50 in |
| Depth (D) | 31.5 mm | 1.24 in |
| Weight | ~390 grams | ~13.8 ounces |
Why the MVX v2.0?
Cross-Platform Compatibility: One of the few gauges in the NDT market offering native OSX (Mac) support alongside Windows for data management.
Precision Timing: The 100MHz DSP provides incredible resolution, allowing for extremely accurate measurements even in thin-gauge materials.
Rugged Design: Like all Dakota units, it features an extruded aluminum body and nickel-plated end caps, making it nearly indestructible on-site.
Standard Package Includes: MVX v2.0 Gauge, Dual Element Transducer, Couplant, USB-C Cable, DakMaster Software, NIST Calibration Certificate, and Rugged Carrying Case.
SKU: Z-149-0006
