NM01CBV2CS
Choose Quantity
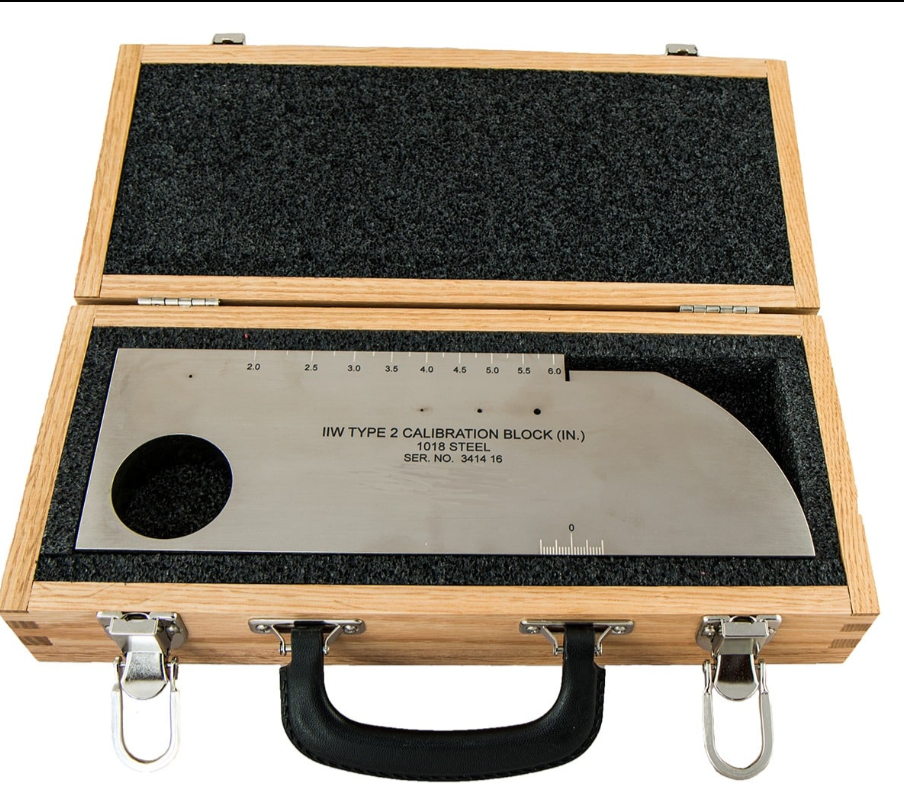
Curtis — V2 Ultrasonic Reference Block (1018 Steel, English, 1/2" Thick)
UT Calibration Block with 5 mm Hole and Wood Case SKU: CBV2CS
Overview
The Curtis V2 Ultrasonic Reference Block is a precision calibration standard designed for ultrasonic testing (UT) setup, verification, and performance checks. Manufactured from 1018 steel, this block provides reliable acoustic response for calibration of ultrasonic flaw detectors, probes, and inspection systems.
Built in English configuration with a 1/2" thickness and 5 mm hole size, the V2 block supports routine calibration tasks such as range setting, sensitivity adjustment, probe verification, and system performance confirmation. Its compact geometry makes it practical for both field and laboratory calibration workflows.
Supplied with a protective wood case, this reference block is ideal for professional NDT environments where accurate, repeatable, and traceable UT setup is essential.
What's Included
| Item | Details |
|---|---|
| Reference Block | V2 UT block, 1018 steel, English, 1/2" thick, 5 mm hole |
| Carrying Case | Protective wood case |
Box Dimensions & Shipping Weight (Estimated)
| Parameter | Imperial |
|---|---|
| Length | 10.0 in |
| Width | 8.0 in |
| Height | 3.0 in |
| Dimensions (L × W × H) | 10.0 × 8.0 × 3.0 in |
| Weight | 4.0 lb |
Key Specifications
| Parameter | Details |
|---|---|
| Product Type | Ultrasonic reference / calibration block |
| Block Type | V2 |
| Material | 1018 steel |
| Units | English |
| Thickness | 1/2" |
| Hole Size | 5 mm |
| Case | Wood case included |
| Application | UT calibration and verification |
| Manufacturer | Curtis |
| SKU | CBV2CS |
Performance Features
Precision UT Calibration
Supports accurate setup and verification of ultrasonic flaw detection systems.
1018 Steel Construction
Provides dependable acoustic response for professional calibration workflows.
5 mm Reference Hole
Offers a consistent reflector for sensitivity and performance checks.
Protective Wood Case
Helps protect the block during storage, handling, and transport.
User-Friendly Design
- Compact and easy to handle
- Suitable for field and lab calibration
- Clear reference geometry for repeatable setup
- Supplied with wood case for organized storage
Built for Industrial Environments
- Durable steel construction for repeated use
- Reliable performance in demanding inspection conditions
- Suitable for training, calibration, and QA/QC programs
- Designed for professional ultrasonic testing workflows
Compatibility
Compatible with:
- Ultrasonic flaw detectors
- Straight beam and angle beam probes
- UT calibration procedures
- Field, shop, and laboratory inspection setups
Ideal Applications
- Ultrasonic system calibration
- Flaw detector setup verification
- Probe performance checks
- Sensitivity and range calibration
- NDT training and certification
- Industrial UT inspection workflows
About Curtis
Curtis Industries is a trusted manufacturer of ultrasonic calibration blocks and reference standards, providing precision-engineered products for professional NDT inspection, training, and equipment verification. Their blocks are widely used where accuracy, durability, and repeatable calibration performance are essential.
