

NM01CSSYSCIRCSCAN2P
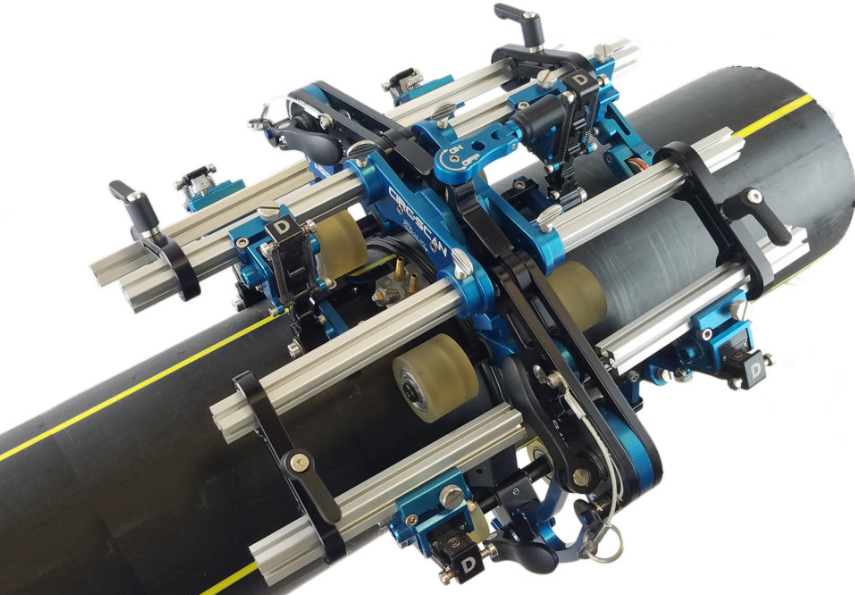
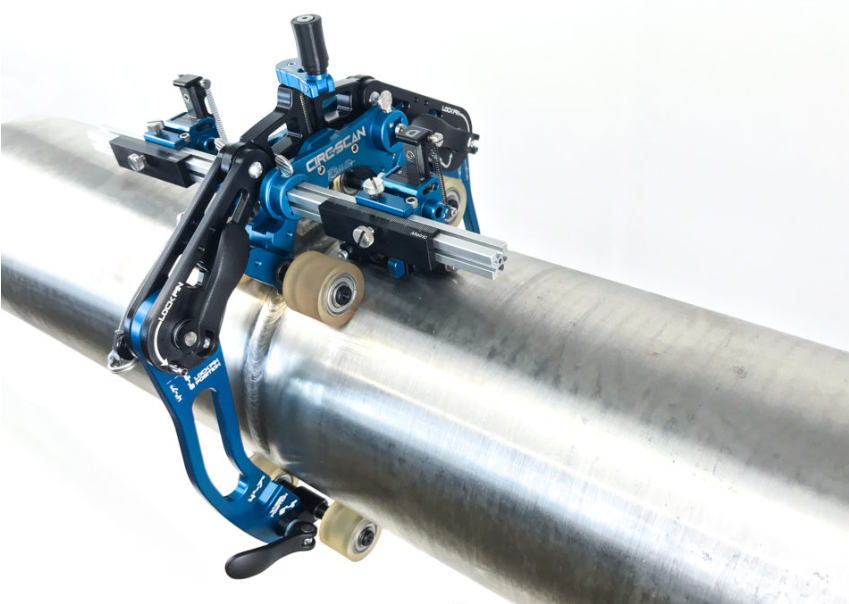
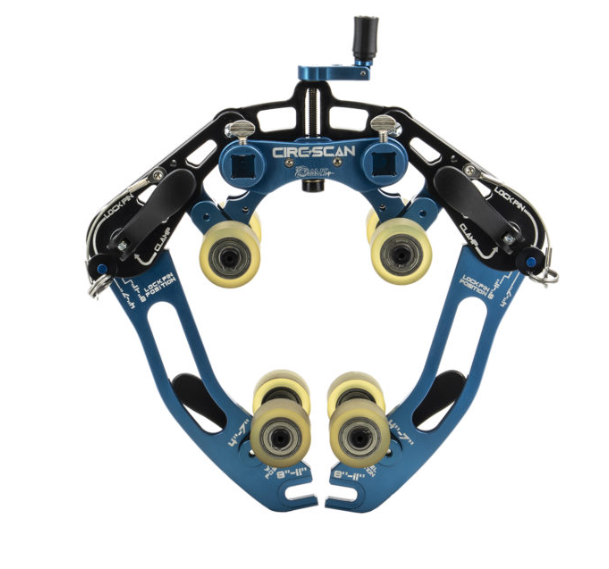
The AUT SOLUTIONS Manual Rotary Clamping Encoded Scanner is a specialized, robust, and highly precise solution designed for automated ultrasonic testing (AUT) of pipe girth welds and general circumferential scanning. This versatile scanner clamps directly onto the pipe and is manually rotated around the circumference, while an integrated encoder precisely tracks its position for accurate data mapping.
Key Features & Benefits:
Wide Pipe Diameter Range: Capable of scanning pipes with diameters ranging from 4 inches to 24 inches (approx. 101.6 mm to 609.6 mm), making it suitable for a broad spectrum of common industrial piping applications in oil & gas, petrochemical, power generation, and construction.
Circumferential Scanning: Engineered specifically for circumferential scanning, allowing for complete 360-degree coverage of pipe girth welds or other features around the pipe's circumference.
Manual Rotary Clamping Mechanism: Features a secure and stable clamping system that attaches directly to the pipe. The manual rotary motion provides the operator with precise control over the scanning speed and position.
Integrated Encoder: Equipped with a high-resolution encoder that provides accurate positional feedback in real-time. This is crucial for creating precise 2D or 3D inspection maps (e.g., C-scans) when paired with an AUT data acquisition system, ensuring every part of the weld is covered and defects are accurately located.
Dual Probe Gimbals: The scanner includes two independent probe gimbals. This advanced feature allows for:
Simultaneous deployment of two ultrasonic probes, ideal for Time-of-Flight Diffraction (TOFD) setups (requiring separate transmitter and receiver probes).
Setting up Phased Array (PAUT) inspections that require multiple probes.
Each gimbal ensures that the probe maintains optimal contact and perpendicularity to the curved pipe surface, even during circumferential movement, maximizing signal integrity.
Rugged Construction: Built from durable materials (e.g., aluminum frame, stainless steel components), ensuring longevity and reliable performance in demanding field environments and varying weather conditions.
Portability and Protection: Comes with a dedicated shipping case, providing safe and convenient transport for the scanner and its accessories, protecting the precision components during transit and storage.
Versatile Application: While primarily used for girth weld inspection (with TOFD and/or PAUT probes), it can also be adapted for corrosion mapping or other general flaw detection tasks on pipes within its diameter range.
AUT SOLUTIONS Quality: Manufactured by AUT SOLUTIONS, a company renowned for specializing in advanced automated ultrasonic testing equipment and solutions, guaranteeing high standards of precision, reliability, and support.
Included Components:
Main Scanner Body: The core mechanical assembly for circumferential pipe scanning.
2 Probe Gimbals: Two articulated probe holders for optimal probe alignment on curved surfaces.
Integrated Encoder: For precise positional tracking and data mapping.
Shipping/Transport Case: A durable, custom-fit case for protection and ease of transport.
Specifications:
Manufacturer: AUT SOLUTIONS
Type: Manual Rotary Clamping Encoded Pipe Scanner
Pipe Diameter Range: 4" to 24" (approx. 101.6 mm to 609.6 mm)
Scanning Direction: Circumferential (360 degrees)
Number of Probe Holders: 2 (with gimbals for articulation)
Encoder: High-resolution, integrated (provides A-scan, B-scan, C-scan mapping capability when connected to AUT system)
Operation: Manual (hand-crank or similar)
Construction Material: Typically aluminum, stainless steel, and durable polymers.
Compatibility: Designed for use with various ultrasonic transducers (e.g., TOFD, Phased Array, Pulse-Echo) and compatible AUT data acquisition systems.
Typical Applications:
Girth Weld Inspection: Primary application for pipelines, pressure vessels, and industrial piping.
Corrosion Mapping: Assessing wall thinning and pitting around pipe circumferences.
Flaw Detection & Sizing: Identifying and characterizing discontinuities such as cracks, laminations, and volumetric flaws.
New Construction & In-service Inspection: Used in both fabrication shops and field environments.
