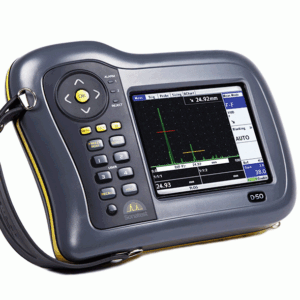
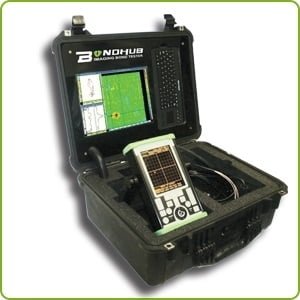
NDT Systems Raptor Ultrasonic Flaw Dtector
Raptor Takes on the Most Difficult Flaw Detection Applications

Have questions about buying this product?
The Raptor flaw detector is used daily throughout the aerospace, automotive, composite, and oil and gas industries. Featuring an enhanced color display and the ability to drive scanners for collection of A, B, and C-scan data, the Raptor collects more accurate results than other portable flaw detectors on the market. The Raptor is unique with its C-scan and 3D imaging capabilities, allowing the operator to tackle the most difficult applications in some of the harshest environments.
With its compact size and the capability to drive manual or automated scanners, the Raptor provides maximum value for the price. On-board and PC-based analysis and reporting software and long-lasting battery life allow for extended hours of inspection work. Day in and day out, the Raptor allows users to achieve exceptionally reliable inspection results for less than the cost of a mainstream flaw detector without imaging capabilities.
- Standard package includes instrument, Pelican style shipping case, manual, batteries and AC
- Splitscan view- Display A-Trace and B-scan or C-scan simultaneously
- C-scan imaging
- Imaging view: Encoded B-scan, spreadsheet view, pan & zoom, 3D, histogram
- 20 point DAC included
- Dual A-Trace Splitview
- v Time and Encoded B-scan, (scanner optional)
- Multiple Gate capability
- Peak Echo hold: fixed or unique timed ‘waterfall’ reset
- Calibration- Range, Delay, Zero and Velocity
- Multiple probe capability
- Auto probe recognition or library selectable
- Adjustable Gain
- Display intensity 10% – 100%
- Audible and visual alarm modes, thickness high, low or high/low. Amplitude +/- level
- Programmable user setups
- Auto 80% gain control
- Screen freeze mode, freeze and save
- Selectable resolution
- Windows based RAPWIN software for imaging analysis
- F1-F8 Context sensitive direct access keys
- Direct access keys to major menus
Applications
- C-scan flaw detection or thickness gauging
- Composite material flaw detection
- Investment Castings Turbine blades
- Tube and Pipe Corrosion mapping
- Storage Tanks
- Boilers Glass
- Metals, plastics, composites, glass, rubber
| Physical / Case | Weight | 5.6lb (2.54kg) |
| Dimensions (W x H x D) | 5.75in. x 9.50in. x 3.00in. (146mm x 241mm x 76mm) | |
| Operating Temperature | 14 °F to 122 °F (-10 °C to 50 °C) | |
| Case Construction | Aluminum body, rubber end caps | |
| Connector type | Dual BNC | |
| Keypad | Keypad construction | Tactile membrane feedback keys, wheel control |
| Transducer | Transducer type | Single, Dual, Angle, Contact, Delay |
| Freq range | 0.5MHz to 30.0MHz | |
| Cable length | 6ft (1.83m) standard | |
| Power Source | Power Source | Single Li-Ion battery |
| Battery life | 8 hours | |
| Display | Display type | Sunreadable Color VGA 60Hz |
| Display size | 640 x 480 pixels, 3.40in. x 4.55in. (86mm x 116mm) | |
| Certification | Certification | Factory Calibration |
| Warranty | Warranty | 1 year |
| Measurements | Thickness range | 0.01in. to 400.000in. (0.254mm to 10,160mm) |
| Units displayed | in. / mm | |
| Resolution | 0.01in. (0.254mm) | |
| Damping | 8 damping levels 25-375Ohms | |
| Delay | 0 to 165in./μs (0 to 4,191.00mm/μs) at Full Range | |
| Display Mode | RF, +HW, -HW, FW filled or outlined | |
| Material Velocity Range | 0.0490 to 0.9999in./μs (1.24 to 25.40mm/μs) | |
| Acquisition Speed | ||
| Pulser/ Receiver | 10Hz to 5000Hz, 50V to 450V- spike and square wave pulse | |
| Pulse width | 20ns to 10,000ns in square wave mode | |
| Gain | 100 dB | |
| Gates | Contact, IP-1st, 1st-2nd (permits thru coating, delay, bubbler, immersion) | |
| IP Blocking, IF Blocking, IF-1st, 1st-2nd, Echo Blk, POS or NEG gating | ||
| 2 flaw gates | ||
| Interface | I/O | USB |
| Memory | Up to 2GB removable SD card |


